Blog

  • 5 Outdoor Survival Tips That Could Save Your Life

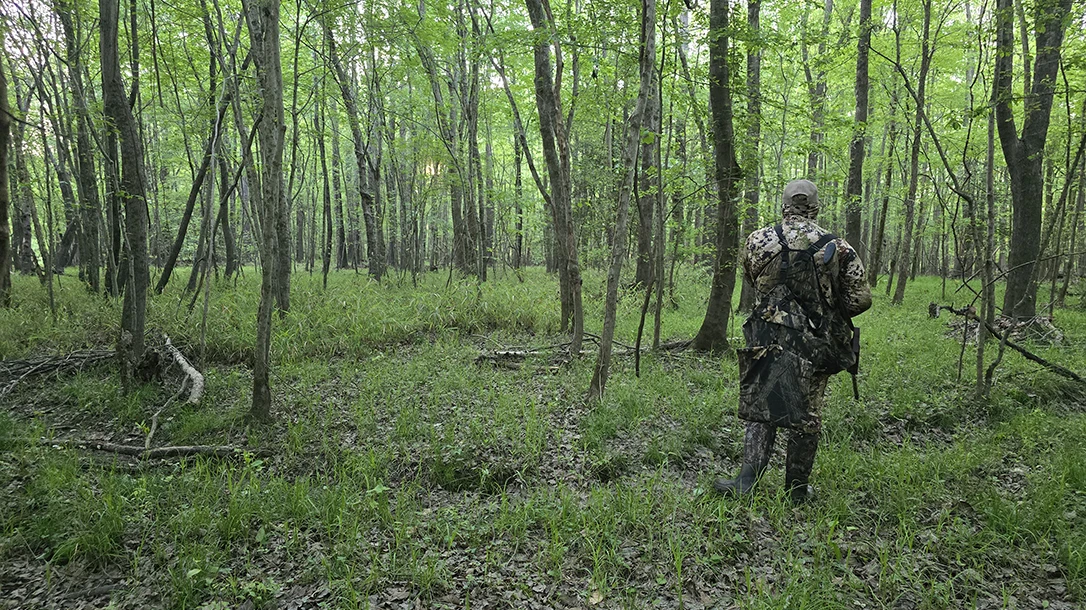
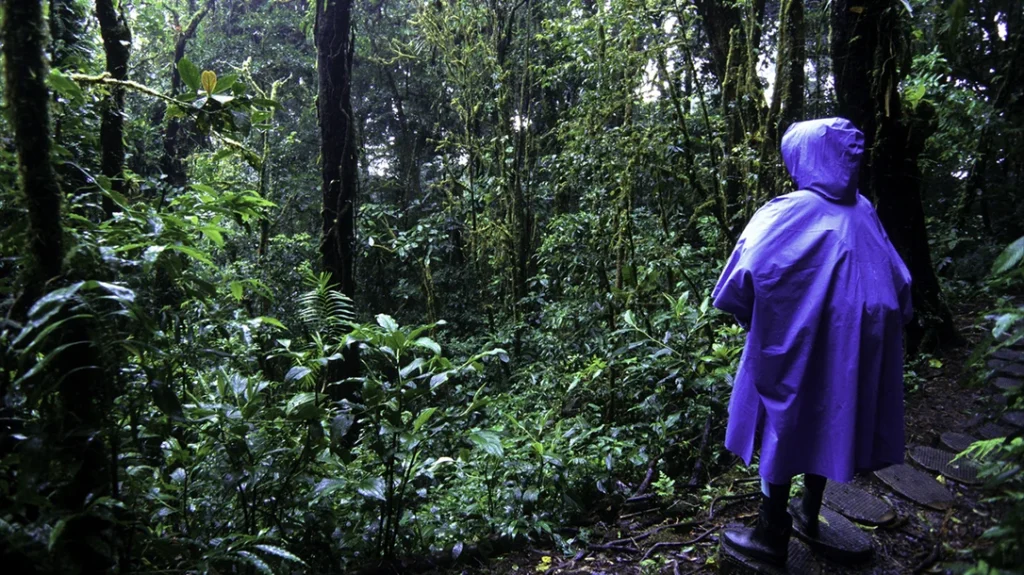
    The great outdoors can be a place full of wonder and adventure. Despite its beauty, the outdoors can also be a dangerous and cruel environment for anyone who doesn’t respect it. 

    Each year, scores of visitors get lost or go missing in national parks. Being educated and aware of what to do if something goes wrong is crucial for survival. 

    Let’s explore five outdoor survival tips that could potentially save your life in case you might happen to get lost in the wilderness. 

    Relax & Remain Calm

    Panicking is one of the worst and most counterproductive things you can possibly do if you find yourself lost in the woods. Even though it’s a completely normal human response, it isn’t a helpful one. It leads to irrational decisions and prevents you from thinking clearly. As a result, you could end up making bad decisions and finding yourself in even more trouble. By staying calm, you can assess the situation and figure out a solution. 

    Practicing the ‘STOP’ Method

    Practicing the STOP method is a good way to remain calm during any situation. This technique whose acronym stands for “Stop, Think, Observe, Plan,” can help you keep a level head and make rational decisions.

    STOP 

    Once you’re calm, the first step is to stop whatever you’re doing. If you’re lost, it is important to stay put. Do not wander around. By staying in the same area, search-and-rescue personnel will have an easier chance of finding you. It also helps you conserve energy and reduce the chances of injuring yourself–which could worsen the situation.

    THINK

    By taking a moment to collect your thoughts, you can mentally retrace your steps and even remember potential landmarks that you last saw prior to getting lost. Stopping and thinking may help you return to a safe location.

    OBSERVE 

    Observe your surroundings. 

    What does your environment look like? 

    Is there a water source nearby? 

    How about signs of human activity? 

    Analyzing the environment around you can help you make informed decisions on what to do next.

    PLAN

    Once you’ve stopped to collect your thoughts and observe your surroundings, you can make a plan based on those observations. Planning can be as simple as creating shelter, retracing your steps, finding a water source or simply choosing to stay put. 

    Water, Food & Shelter

    Survival Shelter

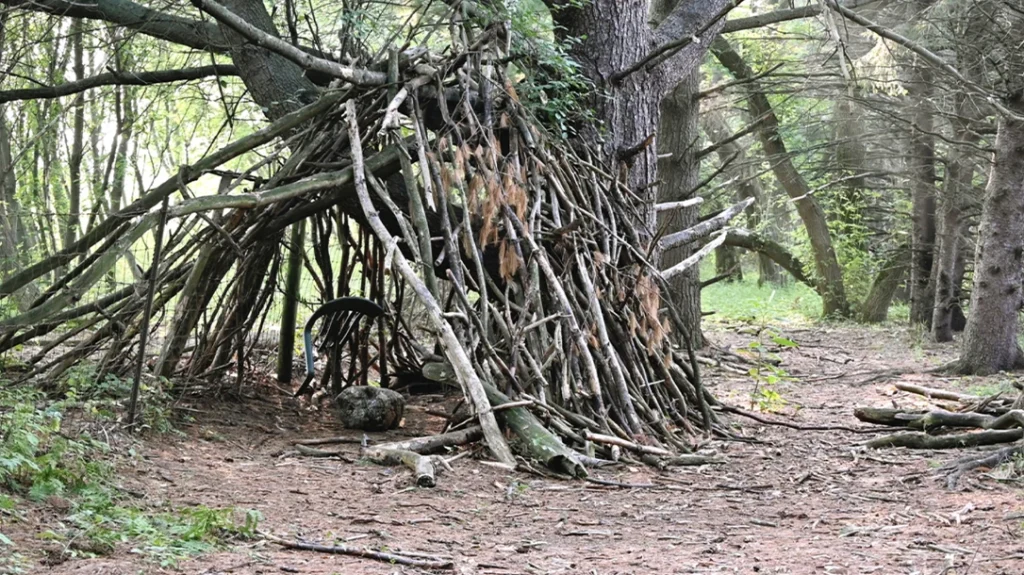
    Every human needs water, food and shelter to survive. In a wilderness survival situation, prioritizing these three different elements can mean the difference between life and death. 

    For example, when dealing with the elements such as wind, rain and harsh sunlight, you risk dealing with hypothermia or hyperthermia. Having a safe area to stay dry, warm and / or cool is a top priority. 

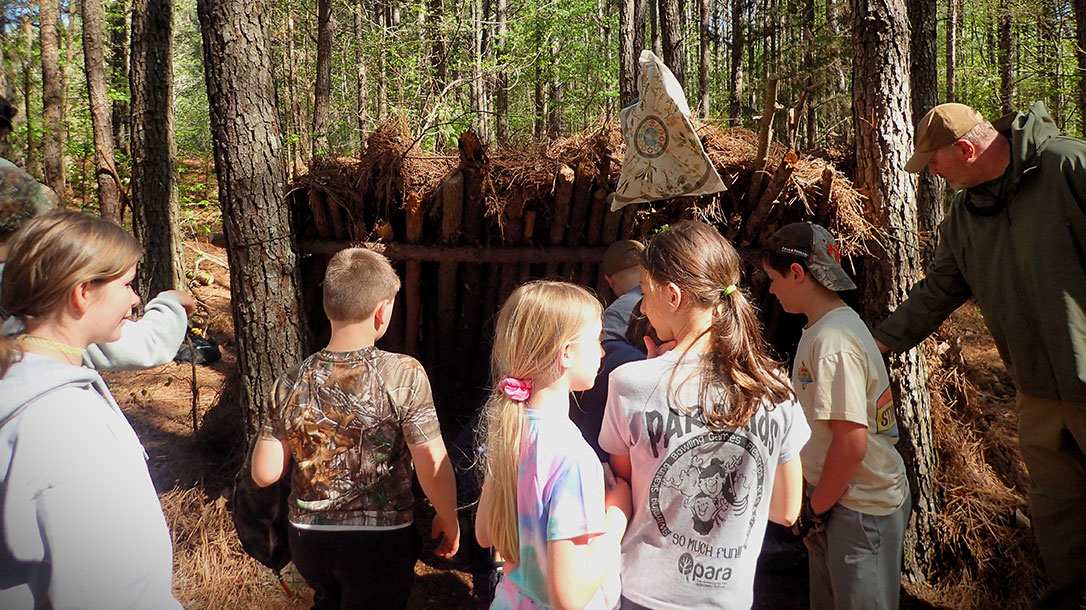
    Hollow trees, caves and rock overhangs are great natural features that can be improvised as shelter. You can also create your own shelters. Use natural materials like  branches, logs and leaves and lean-to shelter. Lean-to shelters are basic improvised shelters with three walls and a sloping roof. They’re called lean-tos because they’re usually leaned against a rock or tree or anything else than can support the shelter.

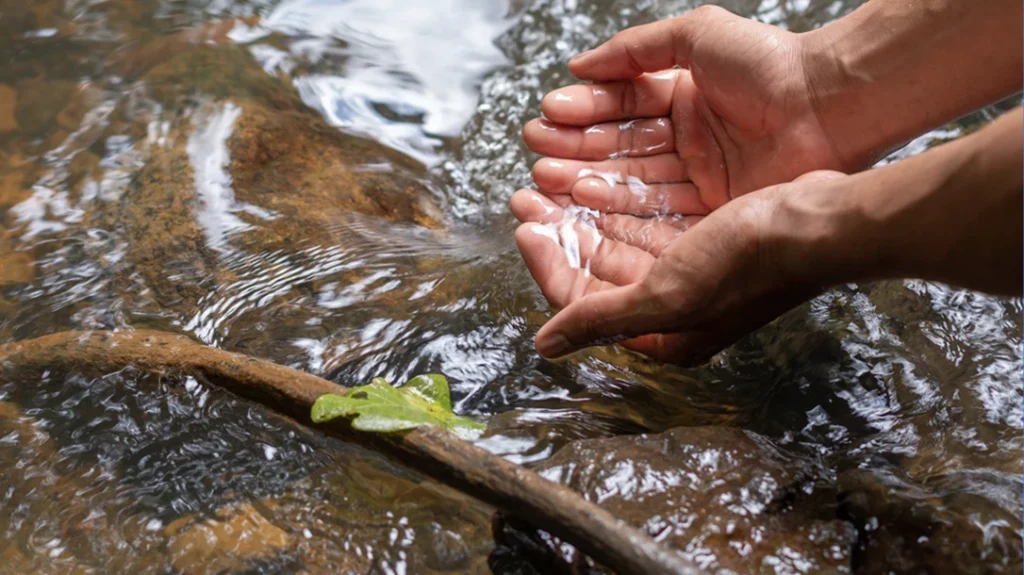
    After securing shelter, finding a water source becomes important. Your best option is flowing water from streams or rivers. Collecting rainwater is also viable. Look for signs of nearby water. These include clues like green vegetation or damp ground.

    Survival Water

    After water, finding food is the next step. It’s a good idea to research safe food sources in the area you’ll be visiting before even thinking about heading out. Generally speaking, survival foodstuffs include berries, plants, nuts or even insects. However, if you cannot recognize the food as safe, do not eat it. 

    Importance of Boiling Water

    Just because you found a water source in the wilderness does not mean it is automatically clean or safe to drink. Treating your drinking water is highly recommended to kill bacteria, viruses and parasites. Bringing water to a rolling boil for a few minutes is a simple way to purify water in a pinch. Remember, the higher the altitude the longer the boil. 

    Signaling for Help

    Knowing how to signal help for help is a valuable survival skill too. One easy way is to use a whistle. Pop three rapid blasts of a whistle to let people know you’re in trouble. 

    You can also spell out “Help” or “SOS” using branches, sticks and logs. Be sure to use contrasting materials and place them in an open area that can be seen clearly from afar. 

    You can also use reflective surfaces, like survival mirrors to create a flashing light that can be seen across long distances from air or ground. Three short flashes, three long flashes, and three short flashes are the universal morse code for ‘SOS.’

    Heading Home

    When traveling outdoors, it pays to be prepared. By knowing to remain calm, practicing the STOP method, creating shelter, boiling  water and signaling for help–your odds of surviving in the wilderness in case something happens dramatically improves.

  • Survival Tips Every Outdoorsman Should Know

    Survival Tips Every Outdoorsman Should Know

    Things don’t always go exactly as planned when you’re in the woods. You can memorize all the ridges, trails, and creeks on a map, but the second you step off the beaten path, the chances of something unexpected happening go through the roof. Hunters know that getting lost, feeling cold, and taking the occasional spill are all part of the game.  

    Survival in the woods rarely looks like it does on popular TV shows. It also doesn’t look particularly heroic.  It’s about being smart, staying calm, and carrying the gear and skills that will keep you in the hunt if things go sideways.

    This guide is for hunters and anglers who spend long days in the field, miles from a blacktop, often well off the trail, and want to be ready for whatever the woods throw their way.

    6 Survival Tips

    Know Your Terrain

    Hunters and anglers can easily get turned around. One minute you’re following a blood trail or chasing the bite, and the next you’ve lost track of where you are.

    No GPS or phone app can replace a basic understanding of the land. Studying maps or satellite images before you head out is smart, but technology fails. When it does, you’ll need more than a screen to get back to the truck.

    Carrying a map and compass is just common sense, but they aren’t worth their weight in dirt if you don’t know how to use them. Basic map-reading and navigation skills should be part of every hunter’s skill set. You should also be able to tell direction by the position of the sun, estimate distance, and recognize water courses and locate them on a map. These skills can keep you from wandering in circles for hours.

    If you get off course and the sun goes down, everything starts to look like north. Shadows lengthen before disappearing altogether, leaving you surrounded by blackness. No flashlight or headlamp, no matter how fancy, will help you tell direction in the dark. A compass works no matter what time of day (or night) it is. Move slowly and check your compass often. It’s also smart to mark your route as you go in case you need to find your way back to where you started. 

    Staying Warm

    Cold, wet, and tired is part of hunting. We’ve all sat in a stand shivering through the last hour of daylight or trudged back to the truck soaked to the bone. The problem comes when those conditions spiral out of control, like when you’re stuck outside longer than expected, the weather shifts hard, or you’ve done something stupid like locked your keys in the truck. In those cases, discomfort can quickly turn into a survival situation.

    The first line of defense is clothing. Dress for the weather you expect and then some. Layering is critical. Start with a moisture-wicking base layer, add an insulating mid-layer, and top it off with an outer shell. Skip cotton. Wet cotton will sap your heat and strength. Wool and synthetics will do more to keep you alive when they’re damp.

    Your daypack should carry insurance. A packable rain jacket, a lightweight outer shell, or both can save you when the forecast lies or you’re hauling meat out after dark. Weather can be unpredictable, and shooting a deer at sunset can turn what would normally be a short walk into a cold, wet ordeal.

    A compact space blanket is another smart addition. It weighs almost nothing but traps body heat and can shield you from wind or rain when you can’t make it back to camp. And if you add a reliable fire starter to the equation, you’re shifting the survival odds back in your favor. 

    Knowing how to throw together a quick windbreak can also be the difference between a rough night and a dangerous one if you get stuck in the woods. Use branches for a frame, pile pine boughs or leaves for insulation, and angle it into the wind. Even a half-shelter blocks the weather and buys time. The goal isn’t comfort. It’s survival. A windbreak and a little heat can get you through the night until you reach camp or help finds you.

    Food & Water

    You can miss a meal and be fine. You can even go a couple of days without eating and still keep moving, though you’ll be miserable. But water is a non-negotiable. Go half a day without it while you’re sweating under a pack, and you’ll feel it. Go longer and your ability to make good decisions (or any decisions) drops fast.

    Most hunters don’t carry enough water for the “what-ifs.” At a minimum, pack an extra bottle. It’s cheap insurance for those times when the drag takes longer than expected or you miss the trail and have to double back. 

    It’s also smart to pack a pocket-sized filter straw or a few purification tablets for backup. They weigh almost nothing and can turn a mud hole into a lifeline. Full-blown survival stories are rare, but dehydration isn’t and can turn a simple setback into a real emergency in hours.

    Food is more forgiving, but it still matters. Toss a couple of snacks in your pack (jerky, nuts, or an energy bar work great). You’re not planning for a picnic. You’re just trying to keep your body from burning itself up while you hike out or wait for daylight. If you do kill something late in the day, that snack can fuel the long drag back to the truck.

    Without water you’re in trouble. Without food you’re uncomfortable. Prepare for both, but prioritize water every single time.

    Basic First Aid

    Even careful hunters are bound to end up with occasional cuts, scrapes, or blisters in the woods. That’s where a simple “boo-boo kit” comes in handy. Bandages, antiseptic wipes, blister pads, and pain relievers aren’t particularly exciting, but they can keep small problems from becoming big ones. 

    Your kit should live in your daypack. But it won’t do you any good if you don’t know how to use it. A basic first-aid course gives you skills you’ll actually use if an accident happens in the woods.

    Covering the minor stuff is good, but don’t forget about the heavy hitters. Knives and firearms are the biggest dangers in the woods. One slip while field dressing, a broadhead in the wrong place, or a misfire can open an artery in seconds. Direct pressure might not be enough. That’s when a real tourniquet can save your life.

    Your first-aid kit for serious injuries should include:
    • A quality tourniquet (SAM XT or C-A-T). 
    • Hemostatic gauze or quick-clot pads.
    • Sterile gauze, tape, and antiseptic wipes for bigger cuts.

    Practice applying your tourniquet before you need it. You don’t want to be fumbling with it, when adrenaline is high and seconds count. Knives slip. A misfire can happen even for the most careful gun owners. When blood is pumping, skill matters just as much as gear.

    Signaling & Communication

    You can hike, hunt, and navigate perfectly, but if you get into trouble and no one can find you, all of that doesn’t really matter. You have to have a plan to call in help if something goes sideways. 

    Start simple. A whistle is loud, lightweight, doesn’t require any batteries, and works when your voice won’t carry. Three short blasts is the universal distress signal.

    Cell phones are fine. Until they’re not. Batteries die and you can’t always bet on having a signal in the woods. In the backcountry, a personal locator beacon (PLB) or satellite messenger can be a literal lifesaver. They’re expensive, but compared to the cost of rescue (or worse) they’re pretty cheap insurance.

    Most importantly, don’t forget to tell someone your hunting plan before you leave. No honey hole is so worth keeping secret that you put your safety in jeopardy. Tell someone you trust the route you plan to take and when you expect to return. If something happens, having someone know where you should be give search-and-rescue a place to start searching. 

    What Should Ride in Your Daypack
    • Map and compass
    • Extra water
    • Pocket-sized filter or purification tablets
    • Extra jacket or rain gear
    • Space blanket
    • Fire starter
    • Headlamp or flashlight with extra batteries
    • Signaling device
    • First-aid supplies
    • Snacks

    Final Thoughts

    Hunting and fishing are great ways to have fun, enjoy nature, and put a meal on the table. Smart outdoorsmen plan for the days when one slip, missed trail, or sudden storm turn a good day into a survival scenario.

    Preparation is the line between inconvenience and emergency. Tell a friend where you’re going. Know your ground. Dress for the weather. Carry water, snacks, and first-aid gear. Then practice your skills so you can act fast if things get ugly.

  • Wilderness Survival and Kids – When to Start Teaching Them

    Wilderness Survival and Kids – When to Start Teaching Them

    Wilderness Survival training isn’t just for adults. Teaching kids wilderness survival skills at an early age lays the foundation for a lifetime of learning and exploration. This valuable skill set equips individuals with the knowledge and abilities to thrive in challenging and unpredictable situations. But who is it for? And why should it begin early? Even with kids?

    Why Teaching Wilderness Survival to Kids is Important

    Survival training is relevant for a wide range of people. This includes Outdoor Enthusiasts, Emergency Responders, Military Personnel, Preppers and Homesteaders, and Urban Dwellers. So, why start early with kids?

    Survival training for children has several compelling reasons:

    1. Building Resilience: Early exposure to survival skills fosters resilience. Kids learn problem-solving, adaptability, and self-reliance, which serve them well throughout life.
    2. Safety Awareness: Teaching kids about hazards, emergency procedures, and basic survival techniques ensures they can respond effectively in unexpected situations.
    3. Life-Long Habits: Skills acquired in childhood tend to stick. By instilling survival knowledge early, we equip kids with tools they’ll carry into adulthood.
    4. Confidence and Empowerment: Knowing how to build a fire, find edible plants, or create a shelter boosts confidence. Kids feel empowered when they can contribute to their well-being.
    5. Nature Connection: Survival training encourages an appreciation for the outdoors. Kids learn about ecosystems, wildlife, and environmental stewardship.

    Introducing kids to wilderness survival skills at an early age promotes a deeper understanding and appreciation for nature. This early exposure sparks curiosity, leading to a lifelong passion for outdoor activities and the environment.

    Furthermore, learning these skills helps children develop a strong connection with nature. Likewise, it fosters a more profound respect for the environment and a sense of responsibility toward preserving it.

    Additionally, teaching kids wilderness survival skills creates opportunities for quality bonding time with family members and peers. As a result, this helps foster strong relationships and create lasting memories.

    A pot hook is a good practice notch for learning knife skills for everyone.

    Start with “Hug-a-Tree”

    When getting started on what skills to teach, start with Hug-a-Tree. People tend to notice when children are missing fairly quickly. So, they must understand that staying put is their best course of action if they ever become lost.

    The Hug-a-Tree and Survive program was established in honor of Jimmy Beveridge, a nine-year-old boy who went missing in southern California in 1981. Tragically, his body was discovered approximately 3 miles from where he was last seen. Search teams said they could have located him sooner if he had stayed in one place and waited.

    The key takeaway from the program is not just about learning survival skills. It’s about embracing the Hug-a-Tree and Survive approach.

    Here are some survival training tips tailored for kids. These can be educational and fun, with extra focus on Shelter, Knife, and Fire skills.

    Easy Shelter Building

    Teach children how to set up basic shelters using cordage and natural materials. Hands-on shelter building is the best approach. Start by explaining what to look for when selecting a campsite for safety and comfort.

    A debris shelter requires few, if any, cutting tools, depending on the area and materials. A long, sturdy ridgepole must be lashed to a tree at an angle. Then, lean sticks against the ridgepole to minimize gaps.

    Once the general framework is set up and explained, it’s time to gather debris. Add plenty of pine straw and debris on top of the wood structure. Soon, it will resemble a hut-like mound of insulation. Kick additional insulation inside for a good amount of insulation.

    A debris hut is taught during the class as a group build. Individuals then get their pictures taken inside. This shelter takes about 2-hours to complete alone, but in a group, it took only 20 minutes.

    Another easy shelter is a classic lean-to, which is built at shoulder height. Start by selecting a sturdy ridgepole and securing it, then layer it with wrist-thick poles found on the forest floor. A small folding saw can make the process easier, but improvising is commendable.

    After laying a single course of thick poles, place smaller sticks at different angles to support the thatching using pine straw. You can fill a garbage bag with debris and dump it over the top for insulation. When the bag is filled for the last time, tie it off to create a mattress.

    Since the lean-to shelter is designed to work with an open fire in front, clear all debris from the front of the shelter and mark the location of the fire with a step.

    Teaching Kids Wilderness Survival: This is a lean-to shelter made from a ridgepole lashed between two trees and support poles leaning against it. Small sticks and debris are layered to create thatching for rain and wind.

    Pro Tip: Poles can be cut by placing them between the crotch of a tree or where two trees are close together. Once they are inserted, apply pressure to crack the poles.

    Knife Skills

    Knife skills and safety go hand in hand. It’s best to teach knife skills with a project or goal in mind—like processing wood for fire. Safely teaching knife deployment, passing techniques, cutting skills, and awareness of people or pets close by is essential for safety.

    Knife skills also go hand in hand with fire preparation. So, making and using a baton/maul are good skills to teach.

    A student uses a baton and knife to split his pole, which will become a fish spear.

    Basic Firemaking

    Teaching children about responsible firewood collection and safe fire building/extinguishing is vital for their outdoor skills. When working with younger children, it’s best to focus on the basics of fire safety rather than actual fire building. This activity involves teaching knife skills, which should be discussed, explained, demonstrated, and practiced.

    The one-stick fire method using dead wood can be a great way to introduce fire building. Once the students have prepared their wood, they can use a Ferro rod to experiment with various types of tinder, such as a cotton ball with Vaseline, jute twine, fatwood shavings, and feather sticks.

    Starting with the easiest and progressing to more challenging materials helps build confidence. It’s important to emphasize that if a material can be lit with a Ferro rod, it can easily be lit with a lighter. With practice, everyone can develop a firm grasp of these skills.

    Teaching Kids Wilderness Survival: Firemaking skills are paramount. Make sure to supervise kids while making and extinguishing fires.

    Finding and Collecting Water

    Use rain to teach kids how to collect rainwater. Show them how to use everyday items like baggies and plastic containers for water collection.

    Water Purification

    Explain the importance of clean drinking water and demonstrate simple purification methods, such as boiling or using purification tablets.

    Build Your Survival Kit

    Help kids assemble a basic survival kit with items such as a compass, fire-starting tools, an emergency blanket, a water filter, and a flashlight.

    Basic First Aid

    Conduct a ‘First Aid Race’ where kids learn to treat common injuries and understand the importance of first aid in survival situations.

    Remember, the key is to make these activities engaging and age-appropriate. Always supervise kids, especially when learning new skills, and make learning fun.

    Teaching Kids Wilderness Survival Lays a Lifelong Foundation

    In summary, survival training benefits diverse groups, and starting early with kids lays a foundation for lifelong preparedness and resourcefulness. Look around for schools and programs that offer training for kids and parents—and have fun!

    Teaching Kids Wilderness Survival: Kids are hardening their fish gigging spears near a fire. They all used a knife and cordage to complete their project.

    SIDEBAR – Don’t Forget A Whistle

    Carrying a whistle in the woods is an essential safety practice. In an emergency, a whistle can be a lifesaving tool—blow it three times. Three is the universal distress call. It can be heard over long distances and help rescuers locate you more quickly than if you were yelling.

    Additionally, whistles are crucial for essential signaling in the wilderness. They can communicate distress or call for help without expending as much energy as shouting. Whistles are also effective in limited visibility, such as dense forests or foggy conditions.

    Overall, having a whistle on hand can make a significant difference in staying safe and being found in an emergency.

  • 15 Must Haves For Your Natural Disaster Kit

    15 Must Haves For Your Natural Disaster Kit

    Whether it be hurricanes, floods, tornados, earthquakes or wildfires, natural disasters are a worldwide occurrence that happen on average 6,800 times per year. This means that it is especially important to stay prepared when these types of catastrophes strike. A simple and easy way you can do so is by building a natural disaster kit. Here are fifteen essential survival items you need to keep you and your family safe.

    Natural Disasters Kit’s 15 Lifesaving Items

    Water

    Depending on factors such as age, sex and overall health, a human can typically go about three to five days without water. This means that water is a vital necessity to have on hand, especially during a situation where clean drinking water may not be available. A reliable source of water to store in your kit is commercially pre-packaged water. These can either be plastic bottles, pouches or bags of water. As for how much to store, a general rule of thumb to follow is a gallon of water per day per person.

    Non-Perishable Food

    The second most important item to include in a survival kit is non-perishable food. This type of food is recommended because it does not expire quickly and can be stored in room temperature environments without any issues. Examples of these foods include canned vegetables, canned soups, rice, protein bars, dried fruits and nuts. It is best to stock up on a three-day supply of food and make sure you frequently check your food’s expiration. 

    Change of Clothes

    During an emergency, staying warm and dry is extremely important to your health. This means that having a spare set of clothes per family member is ideal. It is advised to have layerable clothes such as long-sleeved shirts, long pants, socks, undergarments and even an extra pair of shoes. 

    Cash

    In many types of natural disasters, power outages are a common occurrence which means access to banks or credit card networks may not be readily available. By keeping cash in your kit, you are then able to purchase important necessities like lodging and fuel. Depending on the size of your family, it is recommended to store anywhere between $200 to $1,000. 

    Copy of Important Documents

    In an event you are unable to obtain original documents, it is a smart idea to keep documents copies in a survival kit. These documents can range from your driver’s license, passports, insurance policies and banking information. To avoid your copies getting wet or ruined, make sure you store them in a waterproof and fireproof bag. 

    Flashlight

    Flashlights are another excellent item to keep in a disaster bag because not only do they serve as a light source, especially during a power outage, but they can be a useful tool to signal for help. It is recommended to choose a flashlight that has a high lumen output, different lighting options and one that is compact. Headlamps are also a good option to consider. 

    First Aid Kit

    In many types of natural disasters, injuries are a common occurrence, but it is vital to recognize that medical attention may not be readily available. If this is the case, a first aid kit is ideal to have on hand. These kits are great for treating minor injuries and even preventing injuries from worsening. Several items to include in your kit include bandages, gauze, tweezers and scissors. 

    Medication

    On top of having a first aid kit, medication is another medical supply to include in a disaster kit. These medications can include daily medications and vitamins you take, pain and fever releasers, allergy medications and topical ointments. 

    Respirator 

    Depending on the type of catastrophe you may face, smoke, debris, and unhealthy chemicals can become airborne which means that protecting your lungs is extremely crucial. A simple way you can do so is by including a respirator in your go-bag. A good option to start with is an N95 respirator mask which filters at least 95% of airborne particles. Nonetheless, make sure the mask you choose is NIOSH approved.

    Blankets 

    A blanket is another necessary item to store in a disaster kit because it not only helps keep you warm but can also provide shelter. However, when choosing a blanket to use for an emergency situation it must be one that is lightweight and portable. A great option to consider are known as emergency blankets or also called space blankets. These types of blankets are designed with a high reflective sheet that radiates heat back to the body. 

    Battery Powered Radio

    In situations where electricity may not be available and you need to receive vital updates on the weather or evacuation orders, a battery powered radio is a great option to include in a disaster kit. These radios are often designed to be compact, run on either AA or D cell batteries and are able to receive both AM/FM radio signals. 

    Extra batteries

    If you plan on storing an item in your kit that requires batteries, it is a smart idea to have extra batteries per device on hand. Most batteries have a shelf life of 3 to 5 years, but it all depends on the type of battery and how it is stored. Nonetheless, make sure to store them in a cool, dry place and if able, keep them in the original packaging. 

    Poncho

    Similar to having an extra set of clothes, a poncho is another recommended item to keep individuals warm and dry.  This type of clothing is typically made from nylon or PVC and is designed to be lightweight and compact. Moreover, you can also use ponchos to collect water or use as a covering to keep your belongings dry. 

    Portable Charger

    In order to keep your phone fully charged to communicate with others and get vital lifesaving information, it is advised to purchase a portable charger for your kit. These devices are designed to be compact for easy storage and depending on the quality, can last up to 2 to 3 years. 

    Whistle

    The last item that is recommended to keep in your natural disaster kit is a whistle. In the event you need to signal for help, a whistle is the perfect tool to use. They are not only simple and straightforward to use but they are also easy and compact to store. 

    Peace Of Mind 

    On average, natural disasters kill approximately 40,000 to 50,000 people per year. This means that emergency kits are not only lifesaving to own but can help give you the peace of mind that no matter what happens, you and your family are covered. They are customizable, easy to store in your home or garage and generally inexpensive to own. Whether you build your own kit or purchase one already assembled, you can rest assured that this kit will keep you and your family safe.